Remote Control
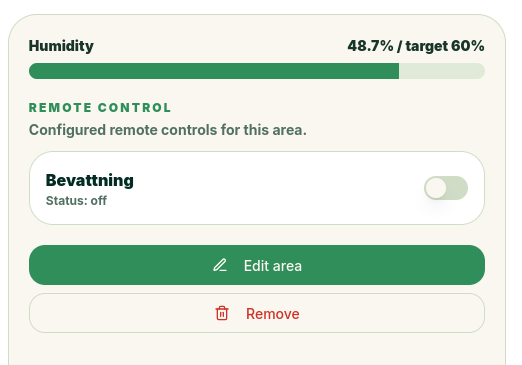
Using the remote control feature in a zone, you can connect buttons and switches that use the REST API to communicate with your remote control system. It has been tested with Home Assistant. This allows you to use your switches to activate irrigation and other functions related to your plants.
API Keys
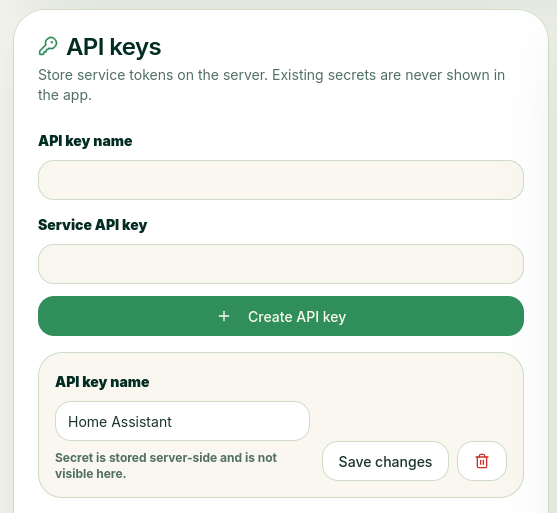 To add a button or switch, you first need to add your API keys so you can use the REST API for your remote control service.
Start by giving it a suitable name; if it’s Home Assistant, we suggest naming it Home Assistant.
Then paste in the API key you have from your service. It won’t be visible once you’ve added it.
Now that you've added all the API keys you need, you can use them to create your buttons and switches.
Controls
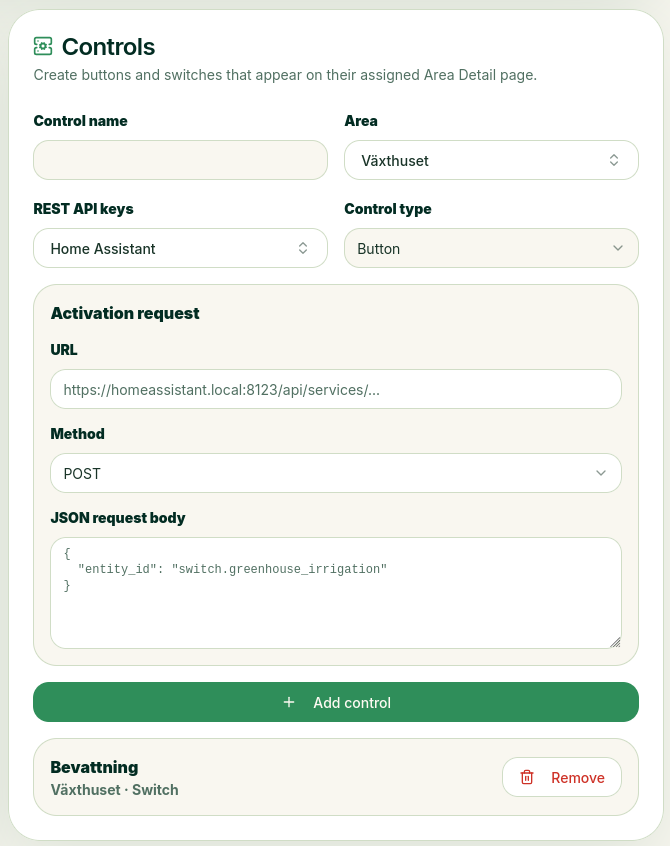 There are two different types of controls: you can create a Button with a simple function that lets you trigger something, or a Switch that you can use to start and stop something, as well as retrieve its status.
Button
The button has no advanced functionality; it’s simply used to trigger an action. In the URL field, enter the API address you’ll use to make a REST API call to your service. Then select the method to use. Next, paste the JSON request that will be sent to your service to trigger this button. You’ll see this button in the list below.
Switch
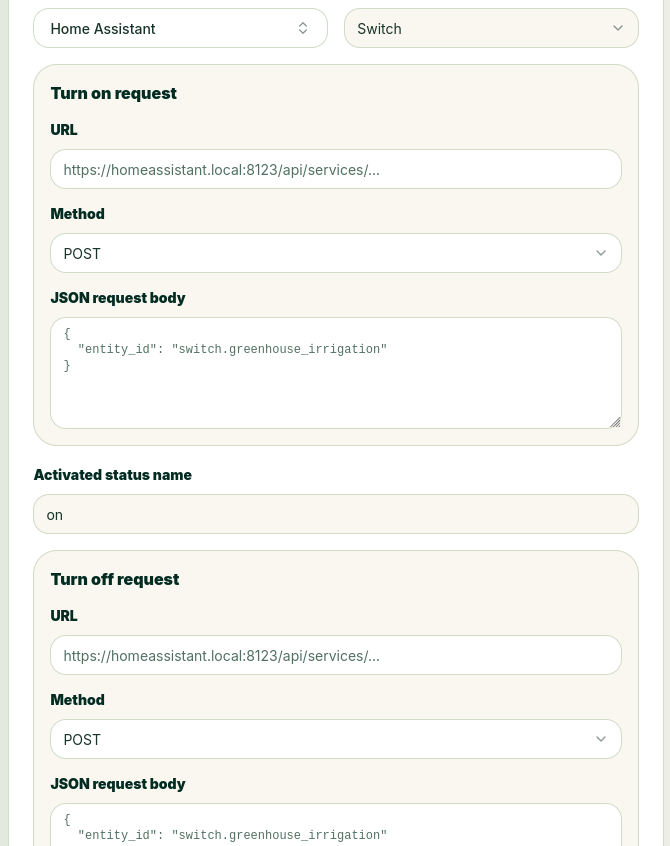 A switch is more advanced and can not only turn the power on and off but also retrieve the switch's status in the background after the time you set, in case it is activated somewhere other than in OlsGrow.
Turn on request is what should be sent via the REST API when you activate the switch; Activated status name is the status name it has when the background activity checks the status via the REST API. See the example below for more details on what this means.
The "Turn Off" request is what should be sent via the REST API when you turn off the switch. The same applies here under "Disabled status name"—that's what it says when it's off in your service.
Status request: This is where you configure what will happen in the background to check which position the switch should be in. This typically uses the GET method.
Status field path: This is what will be checked in the JSON response you receive when you make this call via the REST API. See below for an example, and then there is the Status Check Interval, which specifies in minutes how often the status should be checked.
Example
Below is an example of what a REST API might look like. We’ll use the one used by Home Assistant, since it has been tested and we know it works with that platform. We’ll trigger a switch in Home Assistant that, let’s say, starts the sprinkler system.
Turn on request
Method: POST
URL: http://YOUR_HA_IP:8123/api/services/switch/turn_on
Turn off request
Method: POST
URL: http://YOUR_HA_IP:8123/api/services/switch/turn_off
Status request
Method: GET
URL: http://YOUR_HA_IP:8123/api/states/switch.din_strombrytare